Hey, learner today In this blog post, We will be Creating a Password Generator Using HTML CSS & JS. In the past post, we have created many projects one of them building A Keep Notes App Using HTML CSS & JS. Now it is time to create a Password Generator.
In this Project, we will be creating a password generator application that can auto-generate passwords for you. These generated passwords are comprised of letters, numbers, and symbols. This project helps the user create a Strong password that cannot be easily guessed or brute-forced.
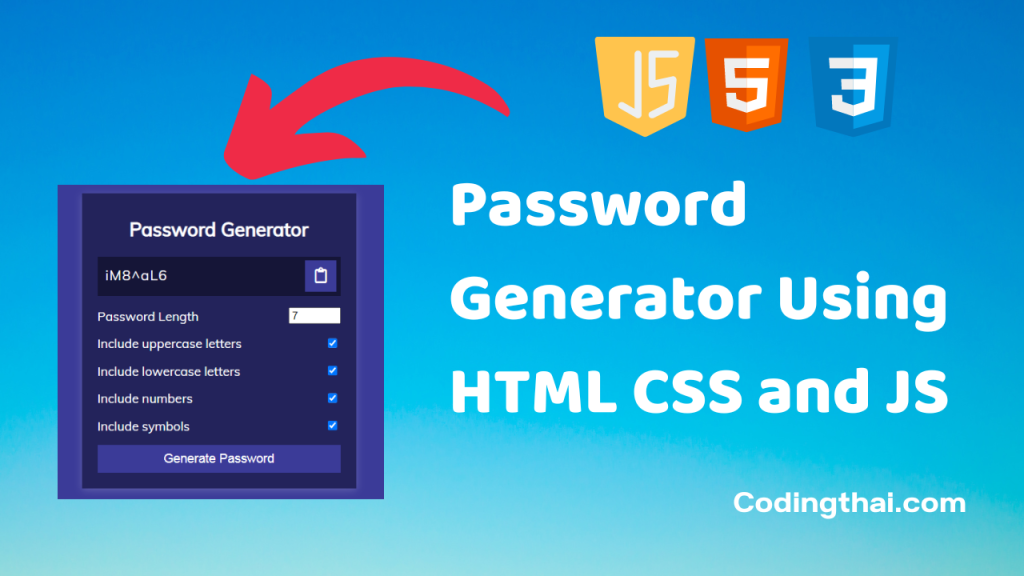
Preview of Password Generator on Codepen
You might like this
- HoverBoard Effect Using HTML CSS & JS
- Responsive Mobile Tab Navigation Bar Using HTML CSS & JS
- Password Strength Background blurred Using HTML CSS and JS
- Responsive Drawing App Using HTML CSS & Javascript
- Theme Clock Digital & Analog Using HTML CSS & Javascript
Creating A Password GeneratorUsing HTML CSS & JS [Source code]
To create a Password Generator Using HTML CSS and JS At first, you have to create three files (HTML, CSS, and JS) files with the named index.html, style.css, and Script.js in the same folder and you have to link the CSS and JS files to HTML. after that paste, the HTML code in index.html, and paste the CSS code in style.css at last paste the Javascript code in Script.js that’s all after pasting the code.
At first, you have to create an HTML file with the named index.html and paste the below HTML code on it and save it. Remember to give a .html extension to the HTML file.
<!DOCTYPE html>
<!--Codingthai.com-->
<html lang="en">
  <head>
    <meta charset="UTF-8" />
    <meta name="viewport" content="width=device-width, initial-scale=1.0" />
    <link rel="stylesheet" href="https://cdnjs.cloudflare.com/ajax/libs/font-awesome/5.14.0/css/all.min.css" integrity="sha512-1PKOgIY59xJ8Co8+NE6FZ+LOAZKjy+KY8iq0G4B3CyeY6wYHN3yt9PW0XpSriVlkMXe40PTKnXrLnZ9+fkDaog==" crossorigin="anonymous" />
    <link rel="stylesheet" href="style.css" />
    <title>Password Generator</title>
  </head>
  <body>
    <div class="container">
      <h2>Password Generator</h2>
      <div class="result-container">
        <span id="result"></span>
        <button class="btn" id="clipboard">
          <i class="far fa-clipboard"></i>
        </button>
      </div>
      <div class="settings">
        <div class="setting">
          <label>Password Length</label>
          <input type="number" id="length" min="4" max="20" value="20">
        </div>
        <div class="setting">
          <label>Include uppercase letters</label>
          <input type="checkbox" id="uppercase" checked>
        </div>
        <div class="setting">
          <label>Include lowercase letters</label>
          <input type="checkbox" id="lowercase" checked>
        </div>
        <div class="setting">
          <label>Include numbers</label>
          <input type="checkbox" id="numbers" checked>
        </div>
        <div class="setting">
          <label>Include symbols</label>
          <input type="checkbox" id="symbols" checked>
        </div>
      </div>

      <button class="btn btn-large" id="generate">
        Generate Password
      </button>
    </div>
    <script src="script.js"></script>
  </body>
</html>
After pasting the HTML code, Now have to create a second CSS file with the named style.css. Paste the below code on it and save it. Again remember to give .css extension to CSS file.
@import url('https://fonts.googleapis.com/css?family=Muli&display=swap');

* {
  box-sizing: border-box;
}

body {
  background-color: #3b3b98;
  color: #fff;
  font-family: 'Muli', sans-serif;
  display: flex;
  flex-direction: column;
  align-items: center;
  justify-content: center;
  height: 100vh;
  overflow: hidden;
  padding: 10px;
  margin: 0;
}

h2 {
  margin: 10px 0 20px;
  text-align: center;
}

.container {
  background-color: #23235b;
  box-shadow: 0px 2px 10px rgba(255, 255, 255, 0.2);
  padding: 20px;
  width: 350px;
  max-width: 100%;
}

.result-container {
  background-color: rgba(0, 0, 0, 0.4);
  display: flex;
  justify-content: flex-start;
  align-items: center;
  position: relative;
  font-size: 18px;
  letter-spacing: 1px;
  padding: 12px 10px;
  height: 50px;
  width: 100%;
}

.result-container #result {
  word-wrap: break-word;
  max-width: calc(100% - 40px);
  overflow-y: scroll;
  height: 100%;
}

#result::-webkit-scrollbar {
  width: 1rem;
}

.result-container .btn {
  position: absolute;
  top: 5px;
  right: 5px;
  width: 40px;
  height: 40px;
  font-size: 20px;
}

.btn {
  border: none;
  background-color: #3b3b98;
  color: #fff;
  font-size: 16px;
  padding: 8px 12px;
  cursor: pointer;
}

.btn-large {
  display: block;
  width: 100%;
}

.setting {
  display: flex;
  justify-content: space-between;
  align-items: center;
  margin: 15px 0;
}
At last, you have to create a Javascript file with the named script.js and paste the Js code on it and save it again don’t forget to give the .js extension to the Javascript file.
const resultEl = document.getElementById('result')
const lengthEl = document.getElementById('length')
const uppercaseEl = document.getElementById('uppercase')
const lowercaseEl = document.getElementById('lowercase')
const numbersEl = document.getElementById('numbers')
const symbolsEl = document.getElementById('symbols')
const generateEl = document.getElementById('generate')
const clipboardEl = document.getElementById('clipboard')

const randomFunc = {
    lower: getRandomLower,
    upper: getRandomUpper,
    number: getRandomNumber,
    symbol: getRandomSymbol
}

clipboardEl.addEventListener('click', () => {
    const textarea = document.createElement('textarea')
    const password = resultEl.innerText

    if(!password) { return }

    textarea.value = password
    document.body.appendChild(textarea)
    textarea.select()
    document.execCommand('copy')
    textarea.remove()
    alert('Password copied to clipboard!')
})

generateEl.addEventListener('click', () => {
    const length = +lengthEl.value
    const hasLower = lowercaseEl.checked
    const hasUpper = uppercaseEl.checked
    const hasNumber = numbersEl.checked
    const hasSymbol = symbolsEl.checked

    resultEl.innerText = generatePassword(hasLower, hasUpper, hasNumber, hasSymbol, length)
})

function generatePassword(lower, upper, number, symbol, length) {
    let generatedPassword = ''
    const typesCount = lower + upper + number + symbol
    const typesArr = [{lower}, {upper}, {number}, {symbol}].filter(item => Object.values(item)[0])

    if(typesCount === 0) {
        return ''
    }

    for(let i = 0; i < length; i += typesCount) {
        typesArr.forEach(type => {
            const funcName = Object.keys(type)[0]
            generatedPassword += randomFunc[funcName]()
        })
    }

    const finalPassword = generatedPassword.slice(0, length)

    return finalPassword
}

function getRandomLower() {
    return String.fromCharCode(Math.floor(Math.random() * 26) + 97)
}

function getRandomUpper() {
    return String.fromCharCode(Math.floor(Math.random() * 26) + 65)
}

function getRandomNumber() {
    return String.fromCharCode(Math.floor(Math.random() * 10) + 48)
}

function getRandomSymbol() {
    const symbols = '!@#$%^&*(){}[]=<>/,.'
    return symbols[Math.floor(Math.random() * symbols.length)]
}
That’s all after pasting the code now your code will be successfully run. If you get any kind of error/problem in the code just comment down or contact me on social media
2 thoughts on “Creating A Password Generator Using Javascript”